I hope you all have gone through my earlier post on Original Master recipe of paper mache clay ...this is the continuation of the last post ....
lets begin
I wanted to find out more about pm ,hence these first hand
experiments were done.
My aim is to find a perfect recipe of pm clay which ensures
a porcelain –like smoothness.
As a hobbyist I don’t have that infrastructure to contest with the Kashmiri Craftsmen,still
the hunger of that perfect smoothness is driving me …I know it would be
impossible for me to follow the exact step by step process of the pm crafts of Kashmir,
hence I have designed my experiments in a way so that it can be done in home environment
with the help of some simple easily
available shop-bought tools,I hope it
will work for me ..lets c
After reading about my experiments ,you are welcome to form
your own conclusions,I will be producing some datas here and ofcourse my
opinion on that..if you have any questions,please feel free to communicate
through the comment section.
WEATHER CONDITION
When I am doing these experiments its winter time,it takes
longer than usual to dry up…my preference is with warm weather..
CONTESTANTS
1.
PM clays ------credit goes to Jonni Good
2.
Saw dust clay-------I know its not related to pm
but ,I gave it a try,credit goes to a Russian blog , I cant pronounce the
name.LOL
3.
Pm+ saw dust--------credit goes to me
4.
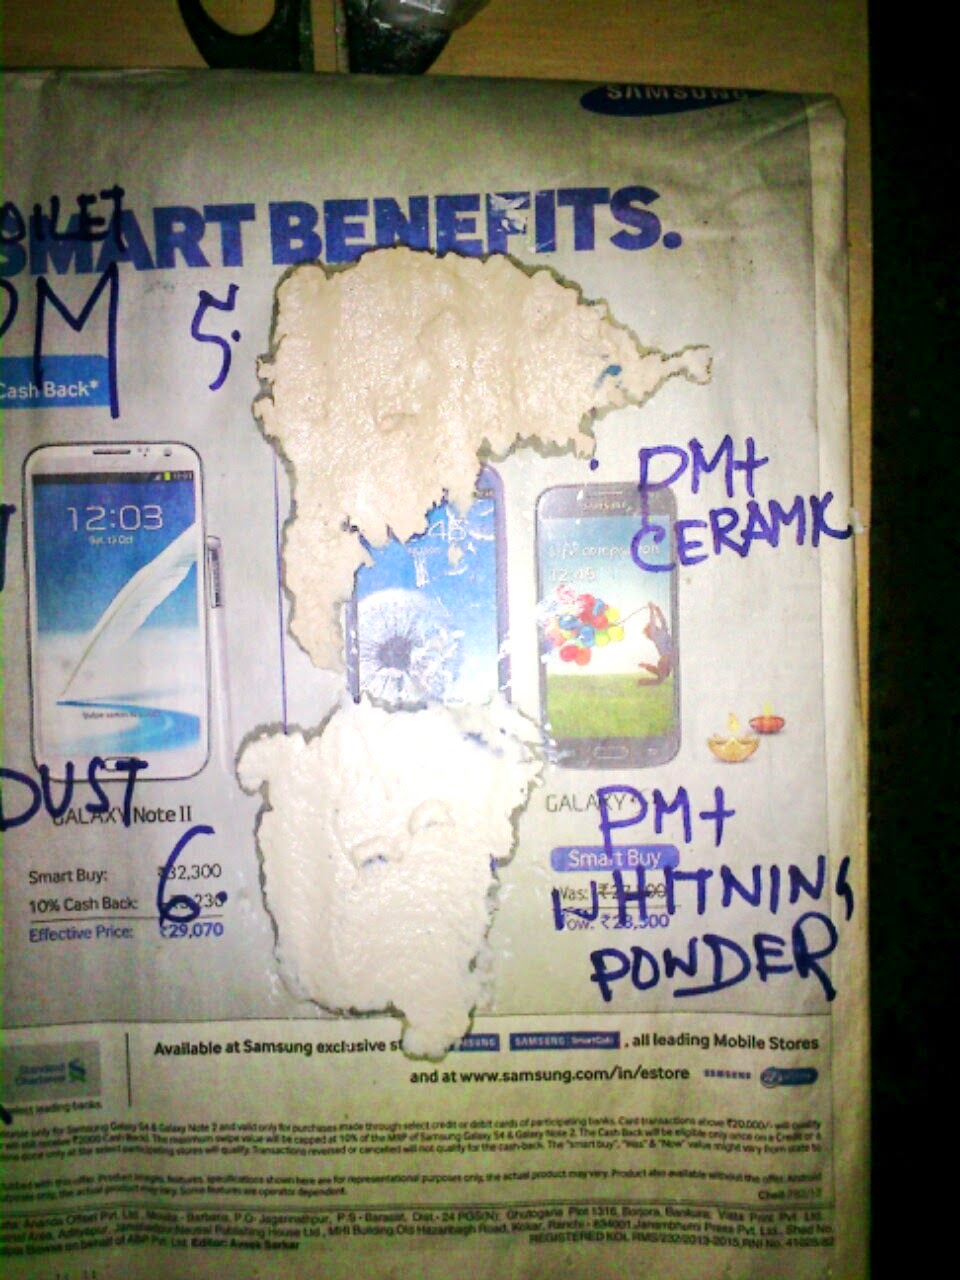
Pm+ china clay ( ceramic powder) credit goes to Jonni
5.
Pm+ whiting powder ----- credit goes to me
6.
Pm+chalk powder----I have read that few people
use it for extra smooth ness

I must tell you there can be hundreds of combinations
,recipes –use your imagination,it may happen that all these 6 formulas fail,you
may even get to discover a completely different recipe …lets explore
since news papers will be the main "base" material,I applied 6 of these one by one on a news paper.

since news papers will be the main "base" material,I applied 6 of these one by one on a news paper.
I hope you can see all the clays after its spread on the news paper.
NEXT MORNING
Pm clay was still wet.for surface smoothness I will give **( 2 stars) out of *****(5 stars)
saw dust clay was also wet,surface smoothness: *
saw dust + pm was not so wet ,surface smoothness:**
pm + chalk was not so wet( damp), for surface smoothness :***
Pm + china clay was dry,smoothness:****
pm+whiting powder was dry ,for smoothness:****
here you may note that ,My aim is to get it smooth from the first stage,no visible bumps and uneven -ness is allowed to happen ,so that we don't have to work hard to make it porcelain -smooth.....that's was the idea I adapted from the beginning-
ok,here I want to add that ,I made news print pm clay earlier for a small project.I was not very happy with the clay after it dried up-it was all bumpy..hence I opted for this idea...some sites even says that news prints contains lead,hence it may not be kid-friendly /environment friendly..
in the evening I tries to sand ( bigger grains) manly those two samples which dried up in the morning,it could be sanded(with out gesso) easily and surface smoothness was satisfactory ...
NEXT MORNING
according to the experts,coating gesso and sanding in between the application, gives to real smoothness..but here I wanted to sand without gesso..
before you sand ,make sure it was completely dry
Pm was smooth enough after sanding ,afterall it was the traditional formula, coverage :***
saw dust was not that smooth ( it was predicted) ,coverage:***
pm+ saw dust: quite smooth,coverage :***
pm+chalk clay :smooth ok,coverage:***
pm+china clay :smooth,coverage :****
pm+Whiting powder:smooth ,coverage :****
note that ,coverage is examined when applied in thin layers
shrinkage rate
Pm ****
saw dust****
pm+ saw dust:***
pm+chalk clay :****
pm+china clay :**
pm+Whiting powder:**
lower number of stars you see,means they have shrink-ed less
now it was a time to choose 2 winners
pm+saw dust
pm+whiting powder
pm+saw dust project made me happy,it was quite smooth,after 2 coats of gesso and sanding the result was good..
here
next projects was a globe
oops!!

happy ...
but search continues
I will be sharing some tips on my next post...
keep creating!!
No comments:
Post a Comment